Saturday, April 18, 2015

How to import Nikon D7200/D7100/D7000 Videos to Windows Movie Maker


Trouble importing the H.264 MOV videos from Nikon D7200/D7100/D7000 to Windows Movie Maker for editing? Simply follow this article to get the reason and solution.


The Nikon Digital SLRs like Nikon D7200, D7100, D7000 are great for us to take high quality images and record vivid full HD videos in MOV format with H.264 codec. Recording your ideas or memory into HD videos with one of the Nikon D-SLRs, you may want to edit the MOV videos in Windows Movie Maker. Then you will come to various problems considering importing or editing the H.264 videos in Windows Movie Maker. As you may know, that Nikon MOV videos shot by D7200, D7100 or D7000 are a log GOP format that is highly compressed, it is not a optimized editing format for Windows Movie Maker. To fix the problem, you'd better transcode MOV to a more editing-friendly format, such as WMV for WMM.

Actually, it's not as difficult as you imagine. What's need is a just a common video converter like EaseFab Video Converter. It supports creating high quality WMV video for your Windows Movie Maker, no matter what's the format of your source video files. It can convert almost any video like MOV, AVI, VOB, MP4, MKV, etc. to WMV so you can import your video to Windows Movie Maker for editing. The guide below will teach you how to convert and import Nikon D7200/D7100/D7000 MOV to Windows Movie Maker so you can make engaging movies with MOV and other video files.

How to Convert MOV to Windows Movie Maker

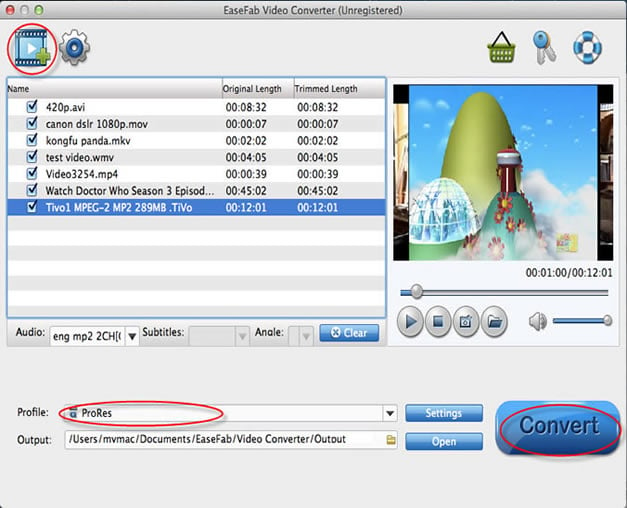
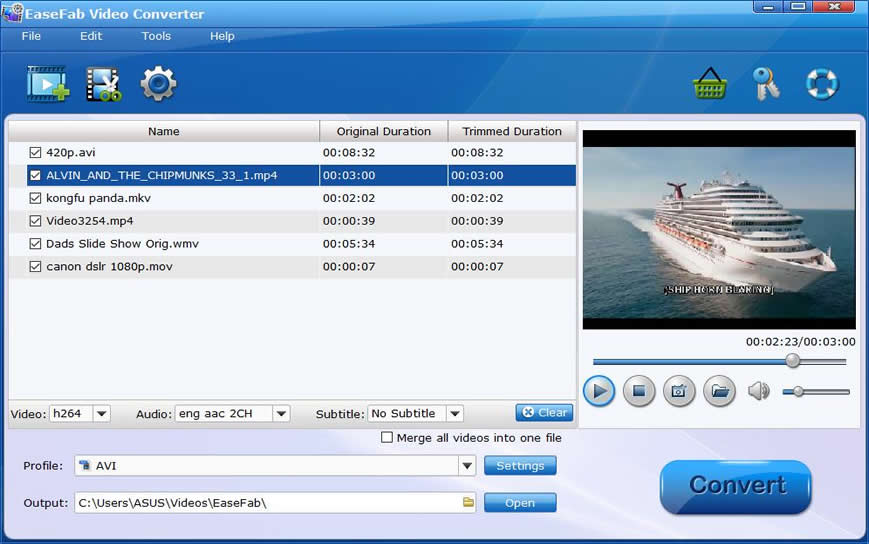
Step 1: Download, install and run the MOV to Windows Movie Maker converter, then click Add Video button to load VOB files from your computer. You can also directly drag the video files into program.


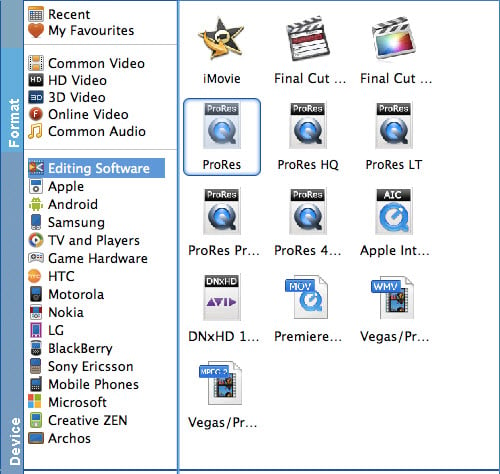
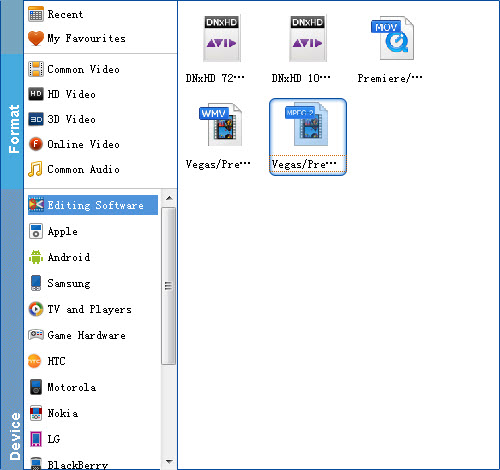
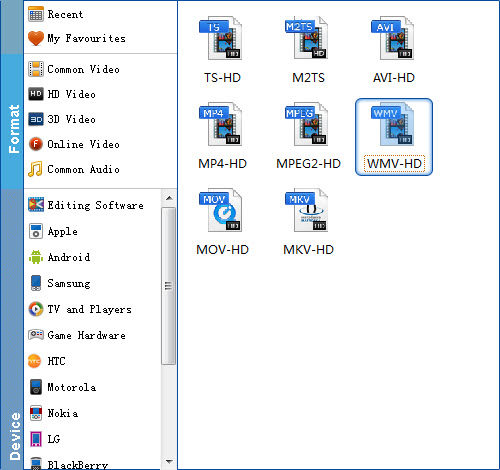
Step 2: Hit the "Profile" box and select "HD Video" > "WMV HD" on the dropdown menu as output format. You can also adjust the output resolution by clicking the Settings button.


Step 3: When all is OK, just click the Convert button to start converting your MOV videos to Windows Movie Maker compatible WMV files. After the conversion, find your converted video clips in the destination folder and add them to Windows Movie Maker for home movie making.

How to import video files to Windows Movie Maker

Depending on your version of Windows Movie Maker or Windows Live Movie Maker, the buttons are slightly different:

Import MOV video to Windows Movie Maker: When the conversion complete, open Windows Movie Maker and click Import or Import Video on the left to import your video to the movie collection and drag and drop to the timeline for editing.

Import MOV video to Windows Live Movie Maker: Start Windows Live Movie Maker and go to Home tab in the ribbon menu and click Add video in the Add panel to locate the converted MOV video.

Thursday, April 16, 2015

Nikon D750 and Final Cut Pro 6/7/X Workflow on Mac(Yosemite)

Summary: Can't log and transfer Nikon D750 videos to Final Cut Pro for editing? Simply follow this article to find the reason and the solution.


Surely the Nikon D750 1080p footages encoded in H.264 with extension of MOV have great video quality so that you can enjoy yourself to play it back. However, if you want to import videos from Nikon D750 to Final Cut Pro X or FCP 7/6 for editing, you will encounter many problems, like import it slowly, and couldn't edit videos smoothly. So what's the matter? And what's the available workaround to fix the problem?

As you know, the MOV is a friendly format for FCP. However, the Nikon DSLR uses the sophisticated H.264 compression method for recording video files to the camera's memory card. This is an ideal file type for video capture in an SLR camera, delivering relatively compact file sizes with image quality noticeably superior to alternate video compressions (such as Motion JPEG). In other words, the H.264 is just a delivery format, which is not ideal for editing. To edit Nikon D750 H.264 MOV files in Final Cut Pro without problems, the easy workaround is to convert them to Apple ProRes codec, which is an appropriate format for smooth editing in Mac with FCP.

To transcode the D750 H.264 to ProRes quickly and easily, EaseFab Video Converter for Mac is highly recommended. This program features high efficiency and seamless conversion. By running it, there is no need to set the codec yourself, the program has optimized ProRes presets for FCP. Besides, it can export advanced encoders like Apple Intermediate Codec, DNxHD, MPEG-2 and more allowing you to convert video to seamlessly fit iMovie, Avid, Premiere, etc. Here is how to do it in simple clicks of mouses.

How to import Nikon D750 video files to FCP X/7/6

Step 1: Launch the Nikon MOV to FCP Converter, and open the folder where you have saved the MOV files, and then directly drag the files to the program interface, the files will be loaded to the program immediately. Alternatively, you can click "Add Video" button to import your MOV video.


Step 2: Click on the "Editing Software" and you will see options to convert your mov video for certain video editing software. Since you will be importing the video to Final Cut Pro after the conversion, have "ProRes" be your selected output format.


Tip: If you are a FCP 6 or former version user, you only can choose ProRes 422 HQ as the output format.

Step 3: Lastly, hit the "Convert" button and this Video Converter for Mac will convert your MOV rapidly.

When the conversion is done, you can import the converted Nikon D750 MOV files to FCP without any trouble. Congratulations! You have successfully taken the first step to make your own masterpiece.

Sunday, April 12, 2015

How to import Canon T6i/T6s MP4 videos to Sony Vegas Pro

Summary: Trouble working Canon T6i/T6s MP4 files in Sony Vegas Pro 13/12/11/10? Simply follow this tutorial to get the reason and solution to fix.


Though Canon's Rebel T6i (750D) and T6s (760D) have notably different body designs, the two models are ultimately only slightly different. Besides producing high resolution images in a variety of shooting conditions, both of them record vivid full HD videos in MP4 format, with H.264 compression codec. After capturing some exciting memories, you may want to import the videos from Canon T6i/T6s to Sony Vegas Pro for some editing. Although the tools for importing the footage have been updated by Canon, it seems not working well when loading the T6i/T6s MP4 files to Vegas Pro 13/12/11/10. To help you solve the issues, we will throw a quick tutorial up on how to enable Sony Vegas Pro to work with MP4 videos from Canon T6i/T6s smoothly without plug-in.

As you know, Canon T6i/T6s all can capture videos saved with H.264 as video codec and stereo sound. While, this MP4 video format came from Canon is a Full HD format that is highly compressed, and it can't be imported and edited in Sony Vegas Pro easily. So, the H.264 compression format should be transcoded into a format better suited for editing with Vegas Pro, and MPEG-2 is. Along with some help from a suitable third-party software, you can achieve your goal in the simplest way.

EaseFab Video Converter is the right tool you need. By running it, there is no need to set the codec yourself, the program provides optimized presets for Sony Vegas Pro. With it, you can convert any video to a fully compatible format without quality loss to seamlessly fit Vegas Pro 13, 12, 11, 10, 9, etc.

Just download, install and launch this great MP4 to Sony Vegas converter and then follow the tutorial to import and edit Canon T6i/T6s MP4 videos in Sony Vegas smoothly.

Guide: Converting Canon T6i/T6s footage to edit in Sony Vegas

Step 1: Click "Add Video" button on the main interface to load your MOV files once you set up the professional MOV Converter on your PC. (Drag&Drop function is another way to import the videos.)


Step 2: For the next step, you'll have to choose an output format for your Canon .mov video file. The program has three already optimized the video settings for Sony Vegas Pro. Here we recommend you choose MPEG-2 which can help you keep the original quality of MP4 video and seamlessly fit Sony Vegas Pro 13/12/11/10/9.


Step 3: Finally, simply click the big Convert button to start converting your videos. The progress bar will show how much time is needed.

When the conversion task is finished, click "Open Folder" button to get the exported files and then import the converted Canon T6i/T6s MP4 files into Vegas Pro to do further editing without any issue.

Sunday, April 5, 2015

Nikon D5500 Workflow with Final Cut Pro X/7/6

Summary: A fluid workflow for importing and editing Nikon D5500 videos in Final Cut Pro without any problems.


A first for Nikon DSLR cameras, the D5500 incorporates a touchscreen LCD monitor, giving you greater camera control. It features a 24.2 megapixel sensor and an EXPEED 4 image processor that provide high-resolution images and Full HD 1080p video with notable low-light sensitivity up to ISO 25600 and up to 5 fps. The same as other Nikon DSLRs, the D5500 records footage with H.264 codec and save the files in MOV container format. The MOV format is FCP friendly but H.264 codec is not natively supported by Final Cut Pro because H.264 encoded contents are highly compressed and are for delivery only. That's why you will encounter problems like this one:

"I can import my Nikon D5500 video into FCP X. Why I can't play the 1080P .mov video in FCP X smoothly? The rendering time is too long."

If you're experiencing the same issues, here's an useful advice for you - converting the H.264 MOV to Apple ProRes Codec before loading Nikon D5500 footage to FCP. To complete the task, what you need is just a common video converter like EaseFab Video Converter for Mac. This program features high efficiency and seamless conversion. With it, you can do batch conversion from the H.264 MOV to ProRes 422 encoded MOV in simple clicks of mouse. The output videos ensure maximum editing quality and efficiency when working with Final Cut Pro X/7/6. Here's how to do it.

How to import Nikon D5500 video to Final Cut Pro

Step 1: Launch the program, and open the folder where you have saved the MOV files, and then directly drag the files to the program interface, the files will be loaded to the program immediately. Alternatively, you can click "Add Video" button to import your MOV video.


Step 2: Click "Profile" bar and go to "Editing Software", then select "Final Cut Pro" as the output format in the format list. The program has already optimized the video settings for Final Cut Pro. The output videos will keep the original quality of MOV video.

Step 3: Hit the "Convert" button and this Video Converter for Mac will convert your MOV rapidly. After the conversion, you can import the output files to Final Cut Pro (the latest FCP X 10.1.3 supported).

When the conversion is done, you can import the converted Nikon D5500 MOV videos to FCP without any trouble. Congratulations! You have successfully taken the first step to make your own masterpiece.

Thursday, April 2, 2015

How to Solve Nikon D800 Video and iMovie Importing Problems

Summary: Have problems importing Nikon D800 video to iMovie for further editing? If so, follow the quick-start guide to learn how to prepare D800 MOV videos for editing in iMovie without quality loss.


The Nikon D800 Digital SLR Camera is more than a DSLR, it's a broadcast quality video camera as well. When it comes to HD movie capture, the D800 shoots broadcast quality video in two D-Movie formats at 1080/30p full HD. However, when you attempt to import Nikon D800 video to iMovie for editing, you may encountered many problems, like import it slowly, and couldn't edit videos smoothly. And you may encounter problems like this one:

"I can import and play D800 video into Aperture 3 without difficulty, but IMovie import of the same video files is very very slow and then crashes."

So what's the matter? What's the available workaround for importing D800 video to iMovie? As far as I know, the Nikon D800 uses the sophisticated H.264 compression method for recording video files to the camera's memory card. This is an ideal file type for video capture in an SLR camera, delivering relatively compact file sizes with image quality noticeably superior to alternate video compressions (such as Motion JPEG). However, the H.264 compression format is not ideal for importing and editing with iMovie. In order to ingest and edit Nikon D800 H.264 MOV files in iMovie smoothly, the H.264 format requires that files be transcoded into a format better suited to editing, effects, and color grading; this would usually be Apple InterMediate Codec.

To do the H.264 MOV to Apple InterMediate Codec conversion task, you're recommended to use EaseFab Video Converter for Mac. By running it, there's no need to set the codec by yourself: the Mac program has a optimized preset for iMovie (iMovie '11 included). The Mac job would be finished with only 3 clicks without losing video quality. See how below about converting Nikon D800 MOV files to iMovie format.

How to transcode Nikon D800 footage for editing iMovie

Step 1: Go to the folder where you have saved the MOV videos, and then directly drag and drop the video files to the program dock. The files will be imported to the application automatically. The program supports batch conversion, you can add multiple files to convert at a time.


Step 2: Go to the Editing Software category and click "iMovie" to set it as the output format. By selecting the "iMovie" preset, you needn't to adjust the video settings like video format, video resolution, frame rate and more by yourself.


Step 3: Hit Convert button and the smart Video Converter Mac will do the rest for you. When finished, the output file is ready for being imported to iMovie for editing. All iMovie versions are supported, including iMovie '11, iMovie '09, iMovie '08, and iMovie HD.

Finally, launch iMovie. In iMovie, go to the File menu, choose Import > Movies, and then navigate to the folder that your output Nikon D800 MOV files are saved. Select the files and click "Import".

By converting MOV to iMovie compatible, you can easily enhance your video and make high quality movies with iMovie.